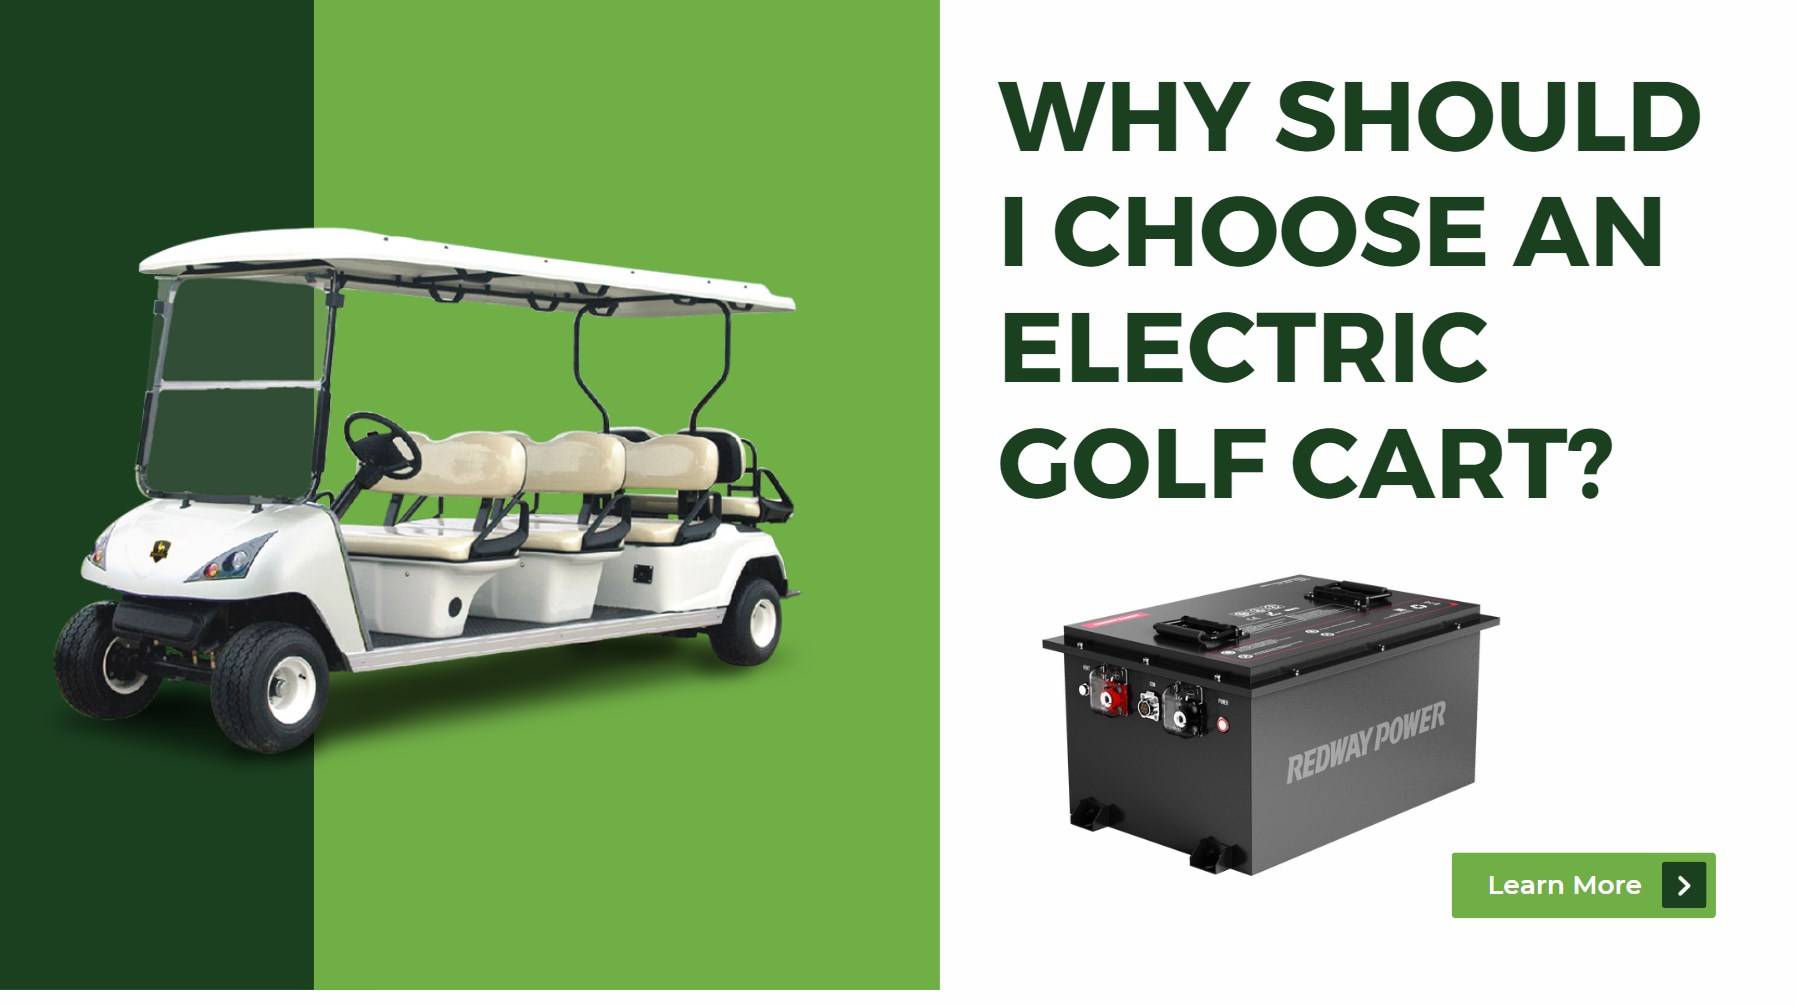
Golf carts are essential vehicles on golf courses, providing convenience and mobility for players and staff. Understanding how golf carts operate, including their components, starting procedures, and maintenance needs, is crucial for safe and efficient use. This guide covers everything you need to know about operating a golf cart effectively.
What are the basic components of a golf cart?
Golf carts typically consist of several key components:
- Chassis: The frame that supports all other components.
- Motor: Electric or gas-powered, providing propulsion.
- Battery: Supplies power in electric carts; gas tanks are found in gas models.
- Wheels and Tires: Designed for stability and traction on various terrains.
- Steering Mechanism: Allows the driver to control direction.
- Braking System: Ensures safe stopping.
Chart Title: Key Components of a Golf Cart
| Component |
Function |
| Chassis |
Supports all parts |
| Motor |
Provides propulsion |
| Battery |
Powers electric models |
| Wheels |
Ensures stability |
| Steering |
Controls direction |
| Brakes |
Stops the vehicle |
How do you start and operate a golf cart?
To start a golf cart:
- Ensure Safety: Make sure all passengers are seated with seat belts fastened.
- Insert Key: Turn the key in the ignition to start the engine (for gas models) or engage the power switch (for electric models).
- Select Direction: Use the forward/reverse switch to choose your direction.
- Accelerate: Press down on the accelerator pedal gently to move forward or backward.
- Brake: To stop, release the accelerator and press down on the brake pedal gradually.
Chart Title: Steps to Start and Operate a Golf Cart
| Step |
Action |
| Ensure Safety |
Seat belts fastened |
| Insert Key |
Turn key or engage power switch |
| Select Direction |
Use forward/reverse switch |
| Accelerate |
Press accelerator pedal gently |
| Brake |
Release accelerator, press brake pedal |
What safety features should you be aware of when driving a golf cart?
Safety features in golf carts include:
- Seat Belts: Essential for passenger safety.
- Speed Limiters: Prevent excessive speeds on courses.
- Lights: For visibility during low-light conditions.
- Reflectors: Enhance visibility for others on the course.
- Emergency Brakes: Help secure the cart when parked.
Chart Title: Important Safety Features in Golf Carts
| Feature |
Purpose |
| Seat Belts |
Protect passengers |
| Speed Limiters |
Control maximum speed |
| Lights |
Improve visibility |
| Reflectors |
Increase awareness |
| Emergency Brakes |
Secure cart when parked |
How do electric golf carts differ from gas-powered models in operation?
Electric golf carts rely on batteries to power an electric motor, providing quiet operation and lower maintenance costs. In contrast, gas-powered carts use internal combustion engines, offering higher speeds and longer ranges but requiring more frequent maintenance due to engine parts.Chart Title: Comparison of Electric vs. Gas-Powered Golf Carts
| Feature |
Electric Golf Carts |
Gas-Powered Golf Carts |
| Power Source |
Rechargeable batteries |
Gasoline engine |
| Noise Level |
Quiet operation |
Noisy operation |
| Maintenance |
Lower maintenance required |
Higher maintenance costs |
What maintenance practices are essential for golf cart longevity?
Regular maintenance is vital for extending the life of your golf cart:
- Battery Care: Check water levels in batteries regularly and clean terminals to prevent corrosion.
- Tire Maintenance: Ensure proper inflation and check for wear regularly.
- Brake Inspection: Test brakes frequently to ensure they function correctly.
- Cleaning: Keep both exterior and interior clean to prevent damage from dirt or debris.
Chart Title: Essential Maintenance Practices for Golf Carts
| Practice |
Frequency |
| Battery Check |
Monthly |
| Tire Inspection |
Bi-weekly |
| Brake Testing |
Monthly |
| Cleaning |
As needed |
Why is understanding load capacity important for safe operation?
Each golf cart has a specified load capacity that should not be exceeded. Overloading can affect handling, increase stopping distances, and lead to accidents. It’s essential to distribute weight evenly among passengers and equipment to maintain stability while driving.Chart Title: Load Capacity Considerations
| Capacity Type |
Importance |
| Maximum Weight Limit |
Prevents tipping |
| Weight Distribution |
Ensures stability during operation |
How can you enhance your golf cart driving experience?
To enhance your experience:
- Customize Your Cart: Consider adding features like upgraded seats, storage options, or technology enhancements such as GPS systems.
- Follow Course Rules: Adhere to speed limits and designated paths to ensure safety.
- Practice Safe Driving Techniques: Always be aware of your surroundings, especially on busy courses.
Industrial News
The demand for electric golf carts is rising as golfers seek more eco-friendly options that reduce noise pollution on courses. Innovations in battery technology are enhancing range and performance, making electric models more appealing than ever. Additionally, manufacturers are focusing on integrating smart technologies into carts, improving user experience through GPS navigation systems and mobile app connectivity.
Redway Power Insights
“Understanding how your golf cart operates is essential not only for safety but also for maximizing enjoyment on the course,” states an expert at Redway Power. “With advancements in technology, modern carts offer features that enhance both functionality and comfort.”
FAQ Section
What type of fuel do gas-powered golf carts use?
Gas-powered golf carts typically use regular gasoline.How far can an electric golf cart travel on a full charge?
Most electric golf carts can travel between 15 to 20 miles on a full charge, depending on weight and terrain.Are there specific rules for operating a golf cart on a course?
Yes, each course may have its own rules regarding speed limits, designated paths, and passenger limits.What should I do if my golf cart won’t start?
Check the battery connections, ensure there’s fuel (for gas models), and consult the manual for troubleshooting steps.
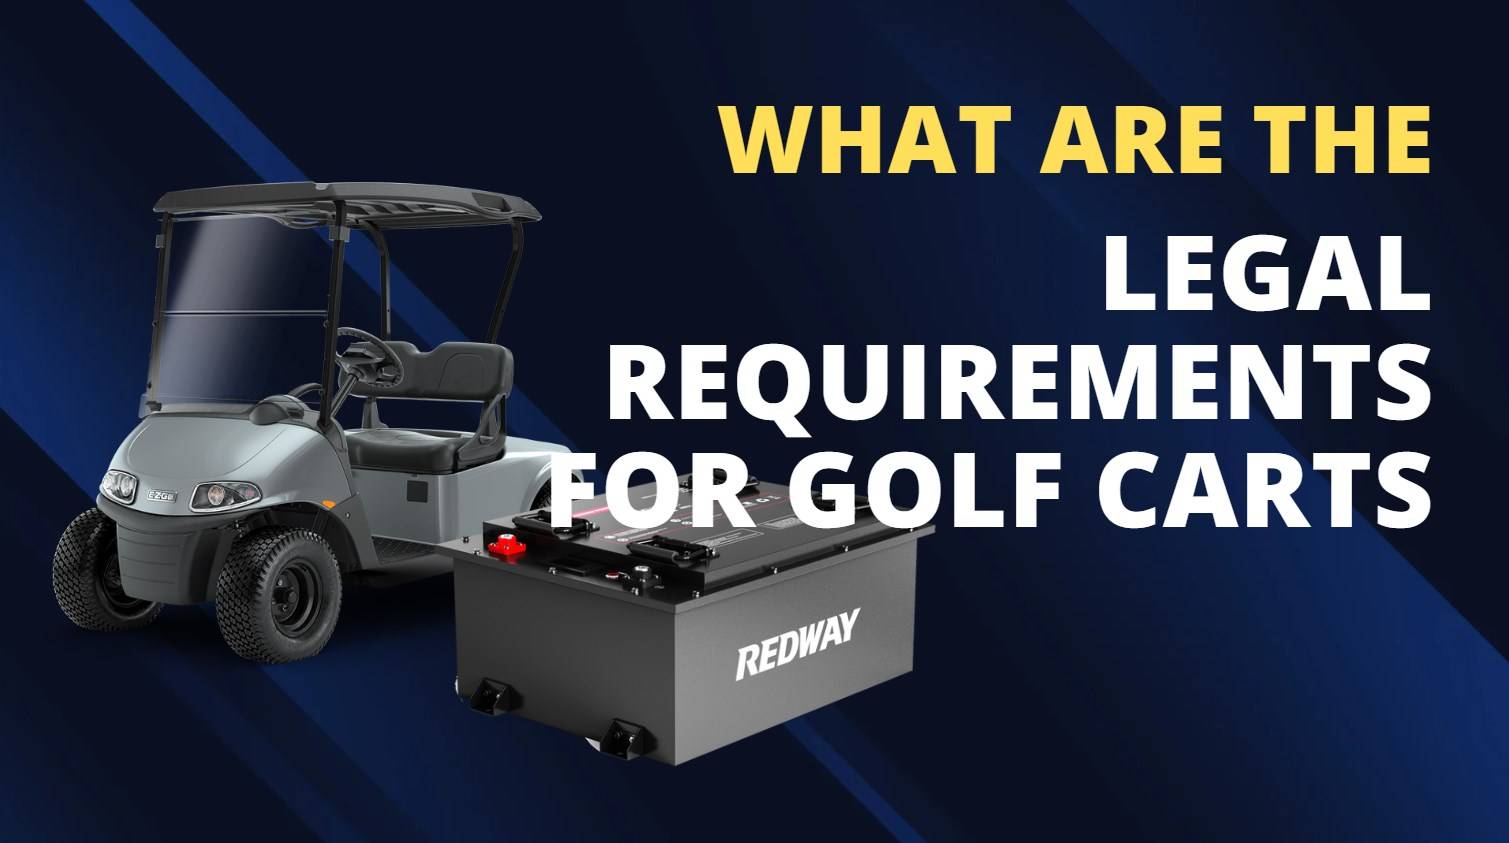
How to make a golf cart street legal?
To make a golf cart street legal, it needs to meet specific requirements. Low-Speed Vehicles (LSVs) and Personal Transportation Vehicles (PTVs) can be street legal if they meet certain criteria. This includes having a maximum speed of 25 mph, rear and front turn indicators, headlamps, a VIN (vehicle ID number), driver-side exterior mirror, outside or inside mirror on the passenger side, and at least three reflex reflectors.
-
Street Legal Definition: Street legal refers to the ability of a golf cart to operate on public roads and comply with the regulations set by local authorities.
-
Low-Speed Vehicles (LSVs): LSVs are golf carts that are designed to meet certain safety standards for street use. They typically have a maximum speed of 25 mph and are equipped with safety features such as turn indicators, headlamps, and mirrors. LSVs must also have a VIN (vehicle ID number) for identification purposes.
-
Personal Transportation Vehicles (PTVs): PTVs are similar to LSVs and are designed for street use. They also have a maximum speed of 25 mph and are equipped with features like turn indicators, headlamps, and mirrors. PTVs must meet the same safety standards as LSVs to be street legal.
Making a golf cart street legal involves meeting specific requirements set by local authorities. Low-Speed Vehicles (LSVs) and Personal Transportation Vehicles (PTVs) can achieve street legal status if they meet criteria such as a maximum speed of 25 mph, rear and front turn indicators, headlamps, a VIN, mirrors, and reflex reflectors. It’s important to check with local regulations and ensure compliance to safely and legally operate a golf cart on public roads.
How to paint a golf cart?
To paint a golf cart, start by washing it thoroughly with an oil-based soap. Remove any removable parts that you don’t want to paint. Sand the surface to create a smooth base. Apply a primer, followed by multiple coats of paint. Finish with a clear coat for protection and a glossy finish.

-
Preparation: Begin by washing the golf cart with an oil-based soap to remove dirt and grime. This ensures a clean surface for the paint to adhere to. Remove any removable parts that you don’t want to paint, such as trim or accessories.
-
Surface Preparation: Use sandpaper to gently sand the surface of the golf cart. This helps to create a smooth and clean surface, allowing the paint to adhere properly. Sanding also helps to remove any imperfections or old paint.
-
Primer Application: Apply a primer to the sanded surface. The primer acts as a base coat, enhancing the adhesion of the paint and providing a smooth foundation for the color coat. Allow the primer to dry according to the manufacturer’s instructions.
-
Paint Application: Apply multiple coats of paint to achieve the desired color and finish. Start with light coats, allowing each coat to dry before applying the next. This helps to prevent drips and ensures an even application. Apply additional coats as needed until the desired color saturation is achieved.
-
Clear Coat Application: Once the paint is dry, apply a clear coat to protect the paint and provide a glossy finish. The clear coat adds durability and helps to prolong the life of the paint. Follow the manufacturer’s instructions for the application of the clear coat.
Painting a golf cart is a rewarding DIY project that allows you to customize its appearance. By following the step-by-step process of washing, sanding, priming, painting, and applying a clear coat, you can transform the look of your golf cart. Take your time, follow the instructions, and enjoy the process of creating a unique and personalized golf cart.
How to read a Club Car golf cart battery charger?
To read a Club Car golf cart battery charger, observe the charge indicator light and amp meter reading. The charge indicator light comes on and remains solid when the battery state of charge falls below 20% and begins flashing below 10%. The amp meter on the charger shows the charging process, with the needle typically going to about 18-20 amps during charging.
-
Charge Indicator Light: The charge indicator light on the charger provides valuable information about the battery’s state of charge. When the battery state of charge falls below 20%, the light comes on and remains solid. This indicates that the battery needs charging. When the battery state of charge falls below 10%, the light starts flashing, indicating a low battery condition.
-
Amp Meter Reading: The amp meter on the charger displays the charging process. When the charger starts, the amp meter needle typically goes to about 18-20 amps. This indicates that the charging process has begun and the charger is providing the necessary current to charge the batteries. As the batteries charge, the amp meter reading gradually decreases until the charging process is complete.
Reading a Club Car golf cart battery charger involves observing the charge indicator light and the amp meter reading. The charge indicator light comes on and remains solid when the battery state of charge falls below 20%, and it starts flashing below 10%. The amp meter reading typically shows a range of 18-20 amps during the charging process. By understanding these indicators, you can monitor the charging status of the batteries and ensure they are properly charged for optimal performance.
How to remove speed limiter on electric golf cart?
To remove the speed limiter or governor on an electric golf cart, start by loosening the screws that hold the cable in place. After disconnecting the cable, the governor can be removed. Adjust the throttle cable to the desired speed by adjusting the tension. This allows for a customized speed experience on the electric golf cart.
-
Locate the Governor: Begin by identifying the speed limiter or governor, which is usually located under the seat or in the engine compartment of the golf cart. It is connected to the throttle cable.
-
Disconnect the Cable: Loosen the screws that hold the cable in place. This allows for the disconnection of the cable from the governor. Once the cable is disconnected, the governor can be removed from the golf cart.
-
Adjust the Throttle Cable: After removing the governor, adjust the throttle cable to the desired speed. This can be done by adjusting the tension on the cable, allowing for a customized speed experience on the electric golf cart.
Removing the speed limiter or governor on an electric golf cart involves disconnecting the cable from the governor and adjusting the throttle cable to the desired speed. This process allows for a customized speed experience, enabling golf cart enthusiasts to enjoy a personalized and tailored ride. It’s essential to follow the necessary steps and ensure proper adjustments for a safe and enjoyable golf cart experience.
How to replace brake shoes on Club Car golf cart?
To replace brake shoes on a Club Car golf cart, start by loosening the brake cable and removing the brake shoe adjusting screw. Release the spring clips and remove the old brake shoes. Install the new brake shoes onto the brake assembly, attach the upper brake spring, and adjust the tension. Test the brakes for proper functioning and adjust the tension if needed.

-
Preparation: Gather the necessary tools and equipment, ensuring a safe and stable work environment. This includes wrenches, pliers, and new brake shoes. Park the golf cart on a flat surface and engage the parking brake.
-
Removing the Old Brake Shoes: Loosen the brake cable at the equalizer and remove the brake shoe adjusting screw. This allows for the release of the spring clips holding the old brake shoes in place. Carefully remove the upper brake spring, and the old brake shoes should come off.
-
Installing the New Brake Shoes: Install the new brake shoes onto the brake assembly, ensuring they are properly aligned. Attach the upper brake spring, securing it in place. Adjust the tension of the brake shoes to ensure optimal performance.
-
Testing and Adjusting: Once the new brake shoes are installed, test the brakes to ensure they are functioning correctly. Apply gentle pressure to the brake pedal and observe the response. If needed, adjust the tension of the brake shoes to achieve the desired braking performance.
Replacing brake shoes on a Club Car golf cart is a crucial maintenance task to ensure safe and reliable braking. By following the step-by-step process of loosening the brake cable, removing the old brake shoes, installing the new brake shoes, and adjusting the tension, you can maintain optimal braking performance on your Club Car golf cart. Regular brake inspections and timely replacements are essential for a safe and enjoyable golf cart experience.
How to soften the suspension on a Club Car golf cart?
To soften the suspension on a Club Car golf cart, consider adjusting the existing suspension components, such as tire pressure and shocks. Modifying the leaf springs by removing or modifying certain leaves can also help create a more flexible suspension. Exploring aftermarket suspension options designed for Club Car golf carts can provide additional choices for softening the suspension.
-
Suspension Adjustment: Start by adjusting the existing suspension components. This can include checking and adjusting the tire pressure to find the optimal balance between comfort and stability. Additionally, inspect and adjust the shocks to ensure they are properly functioning and set to the desired stiffness.
-
Leaf Spring Modification: Modifying the leaf springs can help soften the suspension. Consider removing or modifying certain leaves to create a more flexible and forgiving suspension. This modification can help absorb bumps and uneven terrain, resulting in a smoother ride.
-
Aftermarket Suspension Options: Explore aftermarket suspension options designed specifically for Club Car golf carts. Upgraded shocks, springs, or complete suspension kits can provide additional choices for achieving a softer suspension. These aftermarket options are designed to enhance ride comfort and can be tailored to specific preferences and requirements.
Softening the suspension on a Club Car golf cart involves adjusting existing suspension components, modifying leaf springs, and exploring aftermarket suspension options. By finding the right balance between comfort and stability, golf cart enthusiasts can enjoy a smoother and more enjoyable ride. Remember to consider personal preferences, specific requirements, and seek professional advice if needed when modifying the suspension.
How to speed up electric golf cart Club Car?
To speed up an electric golf cart Club Car, consider upgrading the motor to a more powerful version to increase top speed and torque. Adjusting or upgrading the controller can lead to significant speed improvements. Changing the battery configuration, such as upgrading from six 6-volt batteries to six 8-volt batteries, can also increase the cart’s speed. These modifications can help optimize the performance of the electric golf cart.
-
Motor Upgrade: Upgrading the motor to a more powerful version can significantly increase the top speed and torque of the electric golf cart. A more robust motor provides the necessary power to achieve higher speeds and handle various terrains.
-
Controller Adjustment or Upgrade: The controller plays a crucial role in regulating the power output to the motor. Adjusting or upgrading the controller can optimize the performance and speed of the golf cart. A more advanced controller can provide better control and responsiveness.
-
Battery Configuration: The battery configuration can also impact the speed of the electric golf cart. Upgrading the battery configuration, such as changing from six 6-volt batteries to six 8-volt batteries, can increase the cart’s speed by approximately 33%. This change provides the cart with more power and energy for improved performance.
Increasing the speed of an electric golf cart Club Car involves upgrading the motor, adjusting or upgrading the controller, and considering changes to the battery configuration. By optimizing these components, golf cart enthusiasts can achieve a faster and more exhilarating ride. It’s essential to consider personal preferences, specific requirements, and local regulations when making modifications to ensure a safe and enjoyable golf cart experience.
How to start a Club Car golf cart?
To start a Club Car golf cart, insert the key into the ignition switch. Ensure the forward/reverse switch is in the desired position. Gently press the accelerator pedal to start moving forward. Release the pedal to slow down or stop. Use the brake pedal to bring the golf cart to a complete stop.
-
Key and Ignition: Begin by inserting the key into the ignition switch of the Club Car golf cart. The ignition switch is usually located on the dashboard or steering column.
-
Forward/Reverse Switch: Ensure that the forward/reverse switch is in the desired position. This switch determines the direction in which the golf cart will move. For example, if you want to move forward, ensure the switch is set to the “Forward” position.
-
Pedal and Brake: Once the key is in the ignition and the forward/reverse switch is set, gently press the accelerator pedal to start moving forward. The golf cart will gradually pick up speed. To slow down or stop, release the accelerator pedal. When you need to bring the golf cart to a complete stop, use the brake pedal.
Starting a Club Car golf cart involves inserting the key into the ignition switch, ensuring the forward/reverse switch is set to the desired position, and using the accelerator and brake pedals to control the movement of the golf cart. By following these simple steps, you can start and
operate a Club Car golf cart with ease and enjoy a smooth and enjoyable ride.
How to start a golf cart?
To start a golf cart, insert the key into the ignition and turn it to the right. On the panel behind the steering wheel, push the “Forward/Reverse” switch forward for the forward direction, reverse for the reverse direction, or in the middle for neutral. Keep the switch to the left of the “Forward/Reverse” turned on “Turf” to save battery power.
-
Key and Ignition: Begin by inserting the key into the ignition and turning it to the right. This activates the electrical system of the golf cart, preparing it for operation.
-
Forward/Reverse Switch: Locate the “Forward/Reverse” switch, typically found on the panel behind the steering wheel. Push the switch forward to engage the forward direction, pull it backward for the reverse direction, or leave it in the middle for neutral.
-
Battery Conservation: To conserve battery power when the golf cart is not in use, keep the switch to the left of the “Forward/Reverse” in the “Turf” position. This setting minimizes the drain on the battery and helps prolong its overall life.
Starting a golf cart involves inserting the key into the ignition, turning it to the right, and selecting the desired direction using the “Forward/Reverse” switch. By following these simple steps, you can start a golf cart and begin your journey on the course or wherever your golf cart adventure takes you. Remember to prioritize battery conservation by using the “Turf” position when the golf cart is not in use.
How to tell the year of a Club Car golf cart?
To determine the year of a Club Car golf cart, locate the serial number on the cart. The first two numbers of the serial number often indicate the year of manufacture. For example, if the serial number starts with “19,” it signifies that the golf cart was made in 2019. By examining the serial number, you can easily identify the year of a Club Car golf cart.
-
-
Decoding the Serial Number: Examine the first two numbers of the serial number. In most cases, these numbers represent the year of manufacture. For instance, if the serial number starts with “19,” it indicates that the golf cart was made in 2019. By understanding this pattern, you can easily identify the year of a Club Car golf cart.
-
Additional Resources: If you encounter any difficulties or need more information, refer to Club Car’s official website or consult
golf cart resources that provide detailed instructions on decoding Club Car serial numbers. These resources can offer valuable insights and help you accurately determine the year of your Club Car golf cart.
Determining the year of a Club Car golf cart involves locating the serial number and examining the first two numbers. By understanding the pattern and decoding the serial number, you can easily identify the year of manufacture. Remember to consult official Club Car resources or golf cart references for additional guidance and accurate information.
How to test a golf cart motor?
To test a golf cart motor, use a multimeter set to the continuity check or ohms setting to check for continuity between specific pairs of terminals. Apply voltage, such as 12 to 24 volts, to certain terminals to observe the motor’s response. Ensure the motor spins freely and smoothly, without any unusual noises or resistance. These tests help determine the functionality and condition of the golf cart motor.

-
Multimeter Continuity Test: Begin by using a multimeter set to the continuity check or ohms setting. Check for continuity between specific pairs of terminals on the motor. This test helps identify which pairs should have continuity and which should not.
-
Voltage Application Test: Apply voltage, typically 12 to 24 volts, to specific terminals on the motor. This test helps determine if the motor responds as expected and if the rotation direction can be changed by swapping terminals. Observe the motor’s response and ensure it spins freely and smoothly without any unusual noises or resistance.
-
Motor Functionality Check: Assess the motor’s overall functionality and performance. Pay attention to its speed, torque, and responsiveness. Ensure the motor operates smoothly and meets the desired requirements.
Testing a golf cart motor involves conducting continuity tests, applying voltage, and assessing the motor’s functionality. By following these steps, you can ensure your golf cart motor is in good working condition and capable of delivering the desired performance. Regular motor testing helps identify any issues or potential problems, allowing for timely maintenance and repairs to keep your golf cart running smoothly.
How to test a golf cart solenoid?
To test a golf cart solenoid, turn the key to the ‘on’ position and press the accelerator pedal to activate the solenoid. Use a multimeter to check the voltage across the two small terminals on the solenoid while it is activated. The reading should match the full battery pack voltage. Additionally, check for continuity across the large terminals when the solenoid is activated and deactivated.
-
Voltage Test: Begin by turning the key to the “on” position and pressing the accelerator pedal to activate the solenoid. While the solenoid is activated, use a multimeter to check the voltage across the two small terminals on the solenoid. Ensure the reading matches the full battery pack voltage, such as 36 volts or 48 volts.
-
Continuity Test: Disconnect any wires connected to the solenoid’s large terminals. Set the multimeter to the ohms setting and check for continuity across the large terminals. When the solenoid is not activated, there should be no continuity. When the solenoid is activated, there should be continuity.
Testing a golf cart solenoid involves checking the voltage across the small terminals while the solenoid is activated and checking for continuity across the large terminals. By following these steps, you can ensure your golf cart solenoid is functioning properly and delivering the necessary power for the cart’s operation. Regular solenoid testing helps identify any issues or potential problems, allowing for timely maintenance and repairs to keep your golf cart running smoothly.
How to tow a Club Car golf cart?
To tow a Club Car golf cart, put the forward/reverse switch in the neutral position to disengage the motor. If available, use the tow/run switch and place it in the tow position to ensure the motor is disengaged. When towing on a trailer, securely strap or tie-down the golf cart to prevent movement or damage during transportation.
-
Forward/Reverse Switch: Before towing, put the forward/reverse switch in the neutral position. This disengages the motor and allows the golf cart to be towed without causing any damage.
-
Tow/Run Switch: Some Club Car golf carts may have a tow/run switch. If your cart has this feature, place the switch in the tow position. This further ensures that the motor is disengaged and the golf cart is ready for towing.
-
Secure the Golf Cart: If you are towing the golf cart on a trailer, it is essential to secure it properly. Use straps or tie-downs to secure the golf cart, preventing any movement during transportation. This helps protect the cart and ensures a safe towing experience.
Towing a Club Car golf cart involves putting the forward/reverse switch in neutral to disengage the motor. If available, use the tow/run switch and place it in the tow position. Secure the golf cart properly if towing on a trailer. By following these procedures, you can tow a Club Car golf cart safely and prevent any damage during transportation. Remember to always prioritize safety and ensure that the golf cart is secured properly before towing.
How to translate the serial number on my Club Car golf cart?
To translate the serial number on a Club Car golf cart, note that the first two numbers generally represent the year of production. The second set of numbers indicates the week of production. Additionally, the first two letters of the serial number can indicate the model type, with ‘A’ representing the DS Electric Golf Car.
-
Year Indicator: Look at the first two numbers in the serial number to determine the year of production. For example, if the serial number starts with “19,” it suggests that the golf cart was manufactured in 2019.
-
Week Indicator: Pay attention to the second set of numbers in the serial number, as they indicate the week of production. This information provides additional insights into when the golf cart was manufactured within a specific year.
-
Model Type Indicator: Examine the first two letters of the serial number to identify the model type. For instance, if the serial number starts with “A,” it signifies that the golf cart belongs to the DS Electric Golf Car model.
Translating the serial number on a Club Car golf cart involves deciphering the year and week indicators within the serial number. By understanding these indicators and recognizing the model type, you can gather valuable information about the production details of your Club Car golf cart. This knowledge can be useful for maintenance, identification, and other purposes related to your golf cart.
How to trick a golf cart charger?
To ensure safe and reliable charging of
golf cart batteries, it is important to follow the manufacturer’s guidelines and recommendations. Attempting to trick or bypass a golf cart charger is not recommended, as it can lead to safety hazards and damage to the charger or batteries. Adhering to proper charging procedures and using the appropriate charger is essential for maintaining battery health and prolonging their lifespan.
-
Manufacturer’s Guidelines: Manufacturers provide specific guidelines and recommendations for charging golf cart batteries. These guidelines are designed to ensure safe and optimal charging performance, as well as to protect the batteries and charger from potential damage.
-
Proper Charging Procedures: Following proper charging procedures is crucial for maintaining battery health and prolonging their lifespan. This involves using the appropriate charger, following the recommended charging time, and avoiding overcharging or undercharging.
-
Avoiding Tricks or Bypassing: Attempting to trick or bypass a golf cart charger is not recommended. Doing so can lead to overcharging, undercharging, or other charging-related issues that can damage the charger or batteries. It can also pose safety risks, such as the risk of fire or electric shock.
To ensure safe and reliable charging of golf cart batteries, it is essential to follow the manufacturer’s guidelines and recommendations. Avoid attempting to trick or bypass a golf cart charger, as this can lead to safety hazards and damage to the charger or batteries. Adhering to proper charging procedures and using the appropriate charger is crucial for maintaining battery health and maximizing their lifespan. Remember to prioritize safety and follow the recommended guidelines for optimal charging performance.
How to tune up a Club Car golf cart?
To tune up a Club Car golf cart, examine and replace worn belts and hoses, check the engine oil level, clean the engine cooling air intake, change the air filter, clean and tighten the battery terminals, and lubricate the shift cable pivots and front suspension. These maintenance tasks help ensure optimal performance and longevity of the golf cart.
-
Examine and Replace Worn Belts and Hoses: Regularly inspect the belts and hoses on your golf cart for any signs of wear or damage. If you notice any worn or damaged belts or hoses, it is important to replace them promptly. This helps ensure proper operation and prevents potential issues down the line.
-
Check Engine Oil Level and Change if Necessary: Check the engine oil level regularly and add or change the oil as needed. Proper lubrication is vital for the smooth operation and longevity of the engine. Be sure to follow the manufacturer’s recommendations for the type and frequency of oil changes.
-
Clean Engine Cooling Air Intake and Change Air Filter: The engine cooling air intake should be kept clean and free from debris to ensure proper airflow. Regularly clean the air intake and replace the air filter to maintain optimal engine performance. A clean air filter helps prevent dust and dirt from entering the engine, promoting efficient combustion.
-
Clean and Tighten Battery Terminals: Battery terminals can accumulate corrosion over time, hindering the flow of electricity. Clean the battery terminals regularly using a mixture of baking soda and water, and ensure they are tight to maintain a good electrical connection. This helps maximize battery performance and extend their lifespan.
-
Lubricate Shift Cable Pivots and Front Suspension: Proper lubrication of the shift cable pivots and front suspension components is essential for smooth operation and reduced wear. Use a suitable lubricant to keep these parts well-lubricated and ensure optimal performance.
Tuning up a Club Car golf cart involves performing regular maintenance tasks to keep it in optimal condition. By examining and replacing worn belts and hoses, checking the engine oil level, cleaning the engine cooling air intake and changing the air filter, cleaning and tightening battery terminals, and lubricating shift cable pivots and front suspension, you can ensure that your Club Car golf cart operates smoothly and efficiently. Regular tune-ups help maintain performance, extend the lifespan of the golf cart, and enhance your overall golf cart experience.
How to turn down regenerative braking on a Club Car golf cart?
To reduce or disable regenerative braking on a Club Car golf cart, one method is to unplug the speed sensor, although this may limit the cart’s top speed. Another option is to remove the solenoid, which can eliminate regenerative braking but requires careful consideration. Adjusting the regen braking settings using a handheld programmer may also allow for customization of the braking intensity.
-
Unplugging the Speed Sensor: For certain Club Car models, unplugging the speed sensor can eliminate or reduce regenerative motor braking. However, it’s important to note that this method may put the cart into “limp mode,” limiting its top speed. Consider the impact on overall cart performance before proceeding with this method.
-
Removing the Solenoid: On specific Club Car models, removing the solenoid located on the driver’s side of the cart can eliminate regenerative braking. However, this method may require careful consideration and professional assistance to ensure proper functioning of the cart.
-
Adjusting Regen Braking Settings: Another option is to adjust the regen braking settings using a handheld programmer. This allows for customization of the regen braking intensity without completely disabling it. This method provides flexibility in tailoring the braking experience to personal preferences.
Reducing or disabling regenerative braking on a Club Car golf cart is possible through various methods. Unplugging the speed sensor, removing the solenoid, or adjusting the regen braking settings using a handheld programmer are potential options. It’s important to carefully consider the impact on cart performance and seek professional assistance if needed. By customizing the regen braking experience, you can enhance your golf cart journey and enjoy a braking system that suits your preferences.
How to wire the batteries on a Club Car golf cart?
To wire the batteries on a Club Car golf cart, connect the positive terminal of one battery to the negative terminal of the adjacent battery using suitable cables. Ensure the cables have the appropriate gauge and length for the electrical load. It is recommended to use color-coded cables, such as black for negative terminals and red for positive terminals, for easy identification.
-
Connecting Positive and Negative Terminals: Begin by connecting the positive terminal of one battery to the negative terminal of the adjacent battery. This creates a series connection, allowing the electrical current to flow between the batteries. Ensure a secure connection by using appropriate cables.
-
Proper Cable Selection: Use cables with the suitable gauge and length to connect the batteries. These cables should be capable of handling the electrical load and provide reliable connections. It is important to select cables that are designed for
golf cart applications and can withstand the demands of the system.
Wiring the batteries on a Club Car golf cart involves connecting the positive and negative terminals of the batteries using appropriate cables. By following proper wiring techniques and using suitable cables, you can ensure a reliable electrical connection between the batteries. Remember to select cables with the appropriate gauge and length, and consider using color-coded cables for easy identification. Proper battery wiring is essential for the overall performance and longevity of your Club Car golf cart.