Blog
How to charge 12V battery? A step by step guide

Charging a 12V battery requires careful preparation, identifying terminals correctly, choosing the right charger, connecting it properly, setting correct voltage and current, monitoring progress closely, and disconnecting at the right time to avoid damage. Understanding charging phases and safety precautions ensures a long-lasting battery and optimal performance.
How Should You Prepare for Charging a 12V Battery Safely?
Preparation begins by ensuring the battery and charging environment are safe and suitable. Choose a well-ventilated area away from flames or sparks, and wear safety gear like gloves and goggles. Confirm the battery type matches the charger specifications—lead acid, AGM, or gel batteries have different charging needs. Turn off all vehicle and electrical accessories to avoid power draw during charging. Proper preparation minimizes hazards and enhances charge effectiveness.
How Do You Identify the Positive and Negative Terminals on a 12V Battery?
Typically, the positive terminal is marked with a plus sign (+) and is red, while the negative terminal shows a minus sign (–) and is black. Sometimes terminals have plastic covers that need removal. Misidentifying terminals risks short circuits or damage, so inspect carefully and consult the battery or vehicle manual if uncertain.
How Do You Choose the Right Charger for Your 12V Battery?
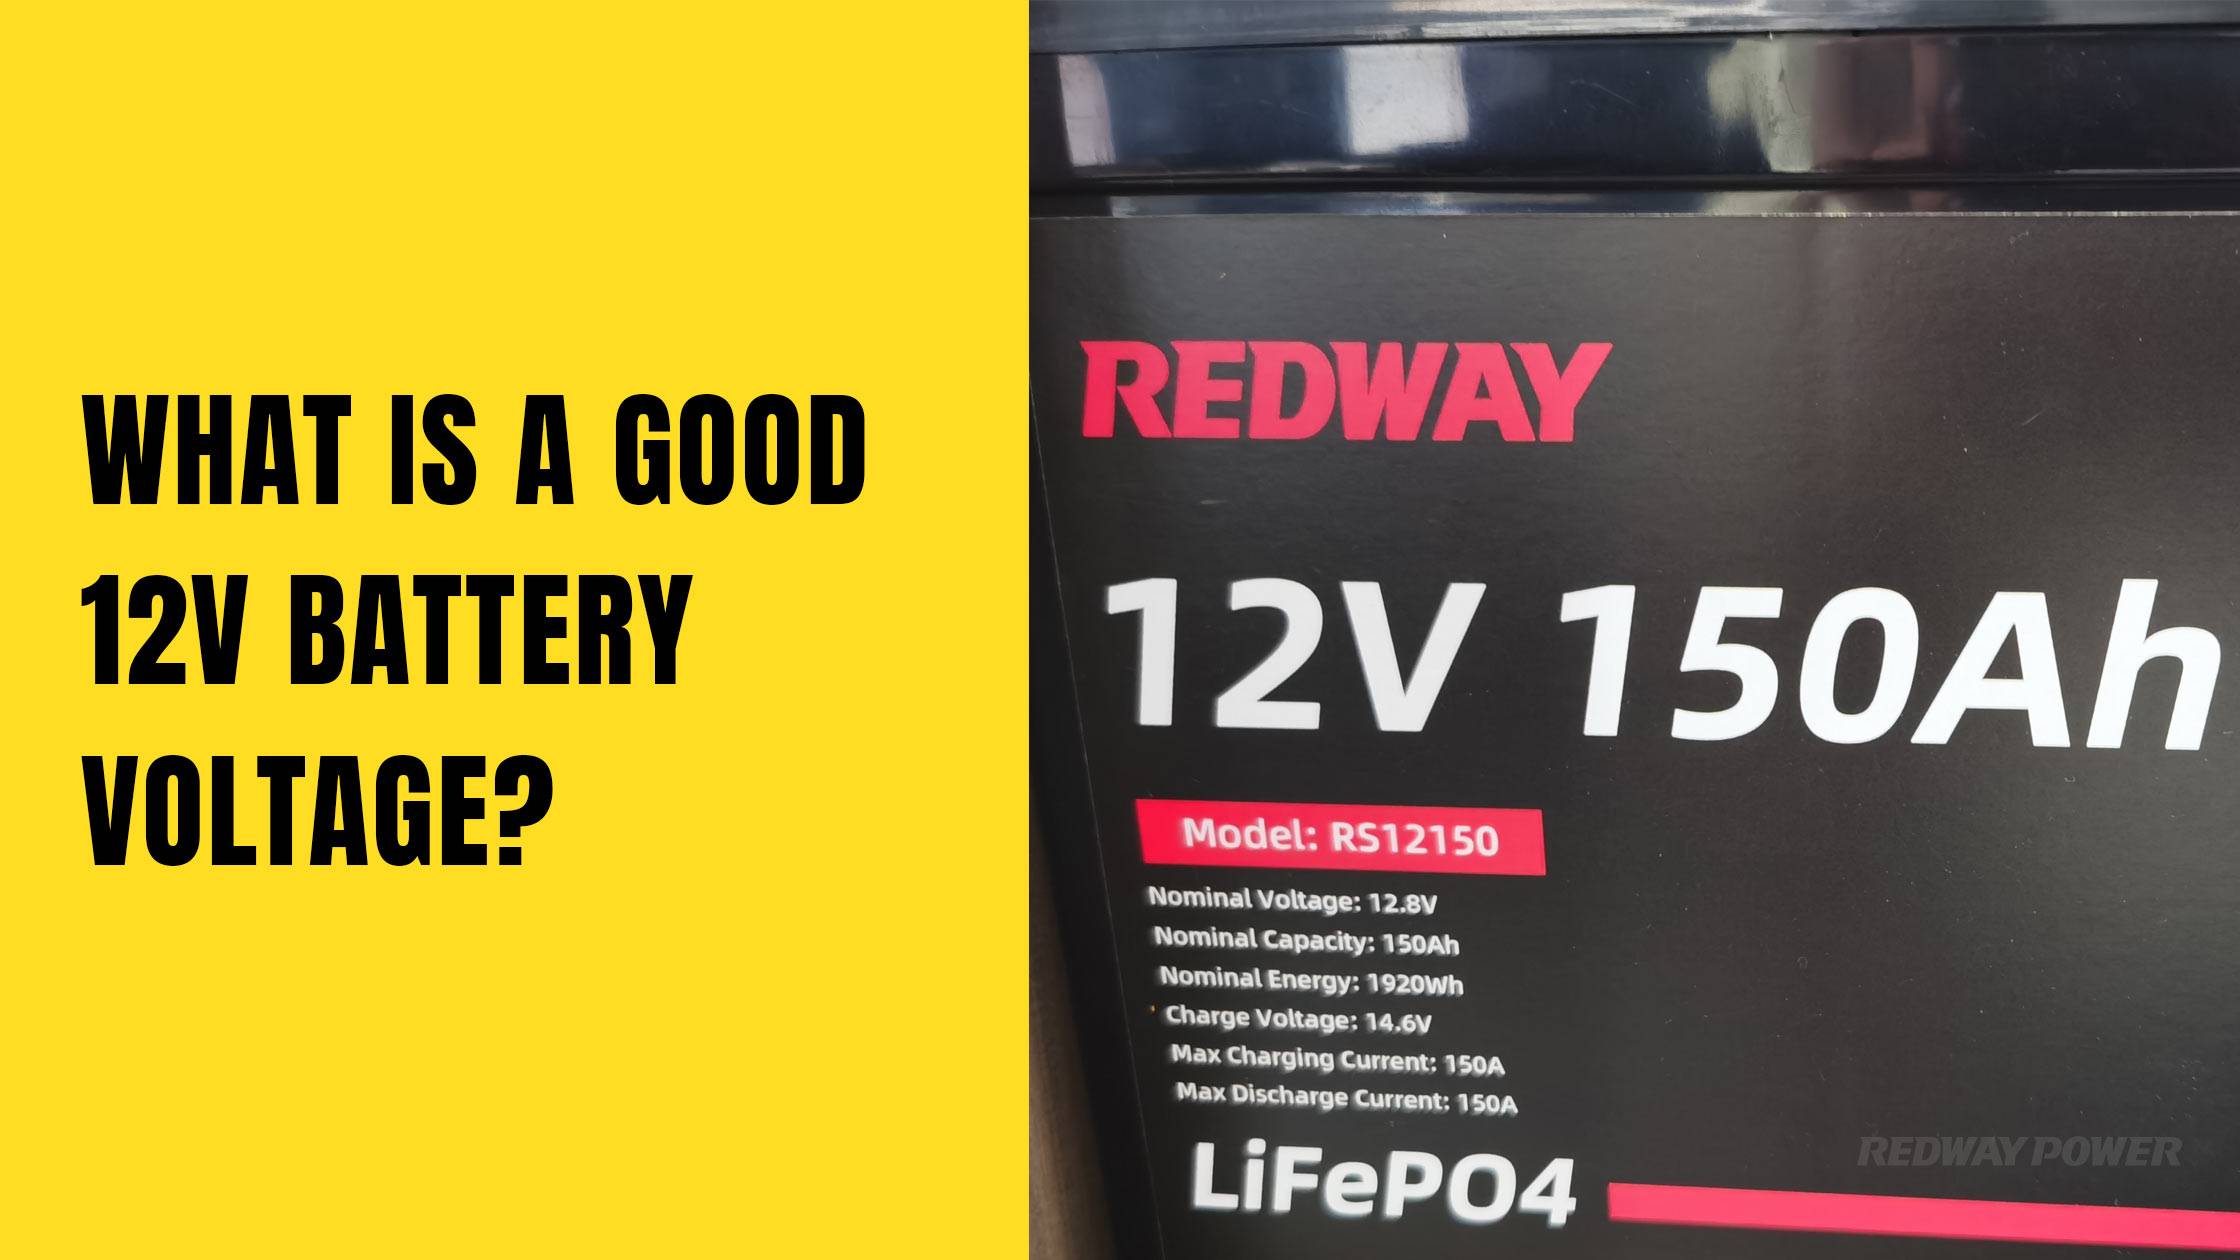
Selecting a charger depends on the battery type and capacity. Chargers vary in charging modes (manual, automatic, trickle), current output (amps), and features like overcharge protection. For example, a slow charger of 2-6 amps is gentler and extends battery life, while higher amps charge faster but risk overheating. Redway Power’s OEM lithium battery packs come with recommended chargers optimized for their battery chemistry, ensuring compatibility and safety.
How Do You Connect the Charger Correctly to the Battery Terminals?
Begin with the charger unplugged and turned off. Attach the red clamp to the positive terminal first, then the black clamp to the negative terminal. Ensure clamps are snug to prevent sparks. Keep the charger cables clear of moving parts. Only after connections are secure should you plug in and activate the charger.
How Do You Set the Appropriate Voltage and Current for Charging?
For a 12V battery, set the charger voltage around 14.2 to 14.7 volts depending on battery type—gel batteries require slightly lower voltage. The current setting should align with battery capacity; a 2-6 amp rate is typical for standard car batteries to balance charge speed and longevity. Chargers with smart modes adjust these parameters automatically, improving charging precision.
How Do You Monitor the Charging Process to Ensure Efficiency?
During charging, observe the charger’s indicators to track voltage, current, and charge completion. Avoid overheating or swelling of the battery. Charging proceeds through phases: the bulk phase (charging up to about 75%), absorption phase (slowing current to finish charging), and float phase (maintaining charge safely). Monitor for abnormal smells or excessive heat, which signal problems.
When Should You Disconnect the Charger to Prevent Overcharging?
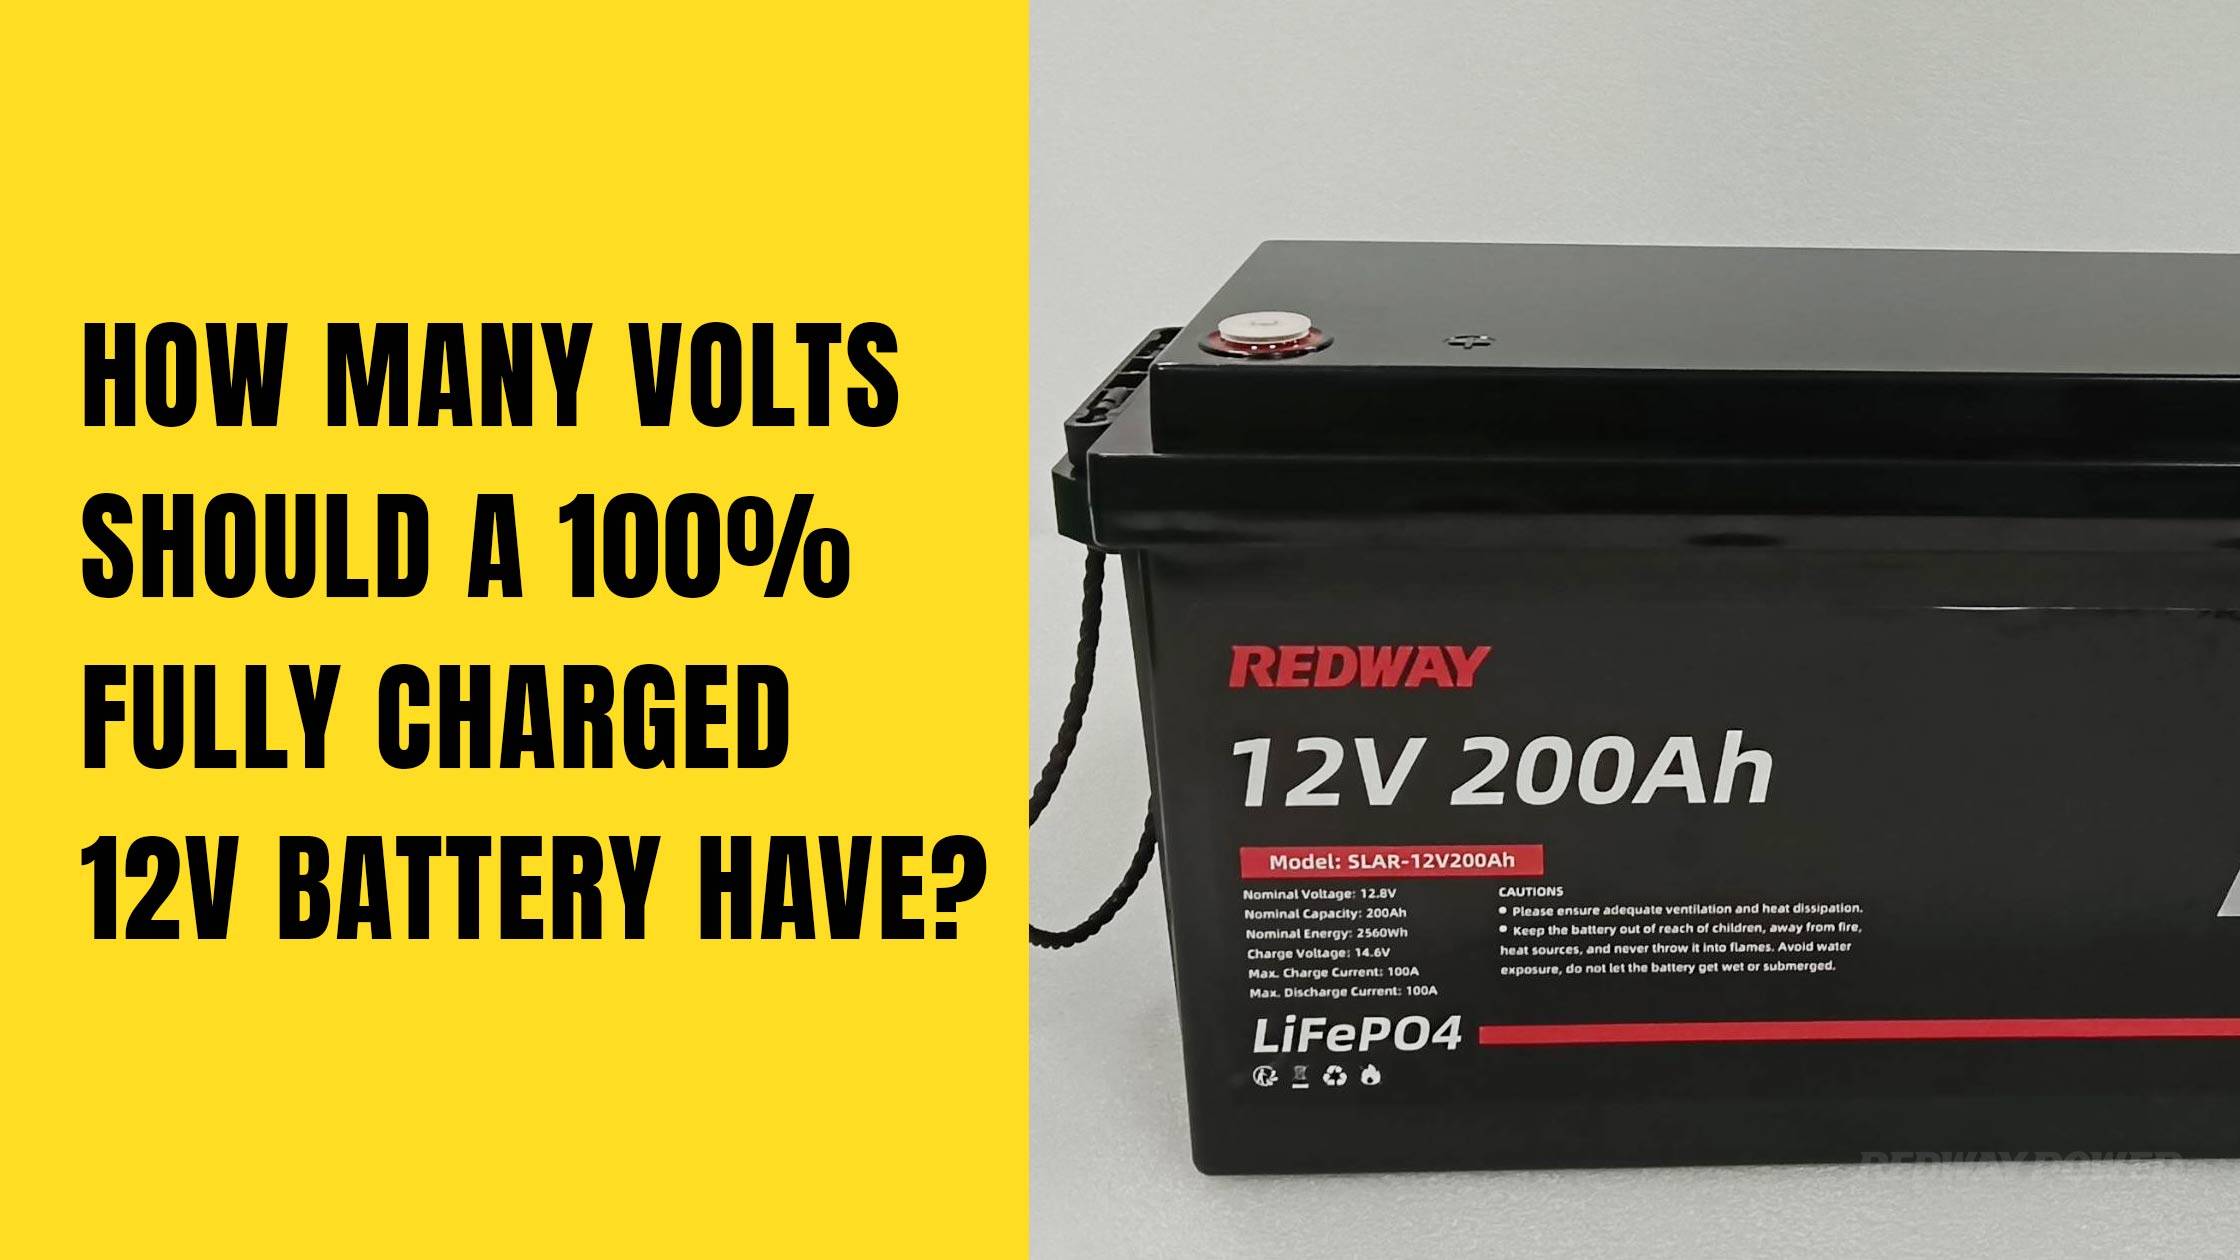
Disconnect the charger once the battery reaches full charge, typically indicated by charger lights or voltmeter reading around 12.7-13 volts resting voltage. Always unplug the charger first, then remove the clamps starting with the negative terminal. Timely disconnection prevents damaging overcharge and extends battery lifespan.
What Are the Different Charging Phases for a 12V Battery and Their Importance?
Charging occurs in three phases:
- Bulk phase: High current charges battery to about 75%, voltage rises steadily.
- Absorption phase: Voltage is held constant, current decreases as battery nears full charge.
- Float phase: Battery is kept at a low trickle charge to maintain 100% capacity without overcharging.
Each phase is vital for thorough charging, preserving battery health while optimizing charge time.
What Safety Precautions Should You Take While Charging?
Safety includes working in a ventilated space, wearing protective gear, never smoking near batteries, avoiding metal contact that can cause shorts, and inspecting batteries for leaks or corrosion beforehand. Use insulated tools and follow manufacturer instructions. If you smell sulfur, indicative of battery gas, cease charging and seek expert help.
How Can You Maintain and Extend the Life of Your 12V Battery?
Regular cleaning of terminals, avoiding deep discharges, slow charging when possible, and storing batteries charged in cool conditions prolong battery life. Redway Power emphasizes quality control in manufacturing plus MES systems to ensure durability and performance, while proper charging practices at home protect your investment.
What Are Common Mistakes to Avoid When Charging a 12V Battery?
Common errors include reversing cables, charging without ventilation, rapid charging at high amperage, unplugging in the wrong order, and leaving chargers attached after full charge. Such mistakes can cause battery damage, reduced lifespan, or safety hazards.
Charging Process and Phase Detail
| Phase | Description | Voltage Range (V) | Current Behavior |
|---|---|---|---|
| Bulk | Rapid charging up to ~75% battery capacity | 12.6 – 14.4 | High steady current |
| Absorption | Voltage held constant, current reduces | ~14.4 | Decreasing current |
| Float | Maintenance charge to keep fully charged state | ~13.2 | Low trickle current |
Charging phases and behavior in a 12V battery charge cycle
This table shows the three main charging phases for a 12V battery with typical voltage ranges and current behavior during each phase, aiding understanding of the charging process.
Redway Power Expert Views
“Charging a 12V battery demands meticulous attention to detail, not only in connecting clamps or setting voltages but in nurturing the subtle dance of chemical reactions inside the battery cells. At Redway Power, we blend advanced manufacturing with stepwise charging techniques to boost performance and durability. Following precise charging protocols is essential for both safety and longevity.” — Senior Engineer, Redway Power
Conclusion
Charging a 12V battery safely and effectively hinges on understanding the correct preparation, charger selection, connection, optimal charging parameters, monitoring, and timely disconnection. Knowing the charging phases and embracing safety measures protects battery health and user safety. By avoiding common pitfalls and adhering to expert advice like Redway Power’s standards, one ensures a prolonged, efficient battery life.
FAQs
Q: Can I charge a 12V battery with a regular charger?
A: Only if the charger matches the battery type, voltage, and current requirements. Using an inappropriate charger risks damage.
Q: What happens if I reverse the positive and negative clamps?
A: Reversing clamps can cause sparks, battery damage, or even explosion. Always double-check terminal polarity.
Q: How long does it take to fully charge a 12V battery?
A: Charging time varies by charger current and battery capacity but generally takes several hours on a slow charger.
Q: Is it safe to leave a 12V battery charger connected overnight?
A: Only if the charger has an automatic float or maintenance mode designed to prevent overcharging.
Q: How do I know when my battery is fully charged?
A: Chargers with indicators or a voltmeter showing resting voltage around 12.7 volts indicate full charge.