Customizing and upgrading a golf cart can significantly enhance its performance, comfort, and overall enjoyment. From improving speed to adding practical features, there are numerous ways to tailor your golf cart to meet your needs. Understanding these options allows you to maximize your investment and enjoy a more personalized driving experience.
How can you effectively upgrade your golf cart?
Upgrading a golf cart involves several key modifications that can enhance its functionality and performance. Start by identifying your goals—whether it’s increasing speed, improving comfort, or adding utility features. Popular upgrades include enhancing the battery system, installing larger tires, adding a lift kit, and incorporating aesthetic changes like custom seats or paint jobs.Chart Title: Popular Golf Cart Upgrades
| Upgrade Type |
Description |
| Battery Upgrade |
Increase voltage for better speed |
| Tire Upgrade |
Larger tires for improved traction |
| Lift Kit |
Raises the cart for better ground clearance |
| Custom Seats |
Enhanced comfort with personalized designs |
What are the best upgrades for enhancing speed and performance?
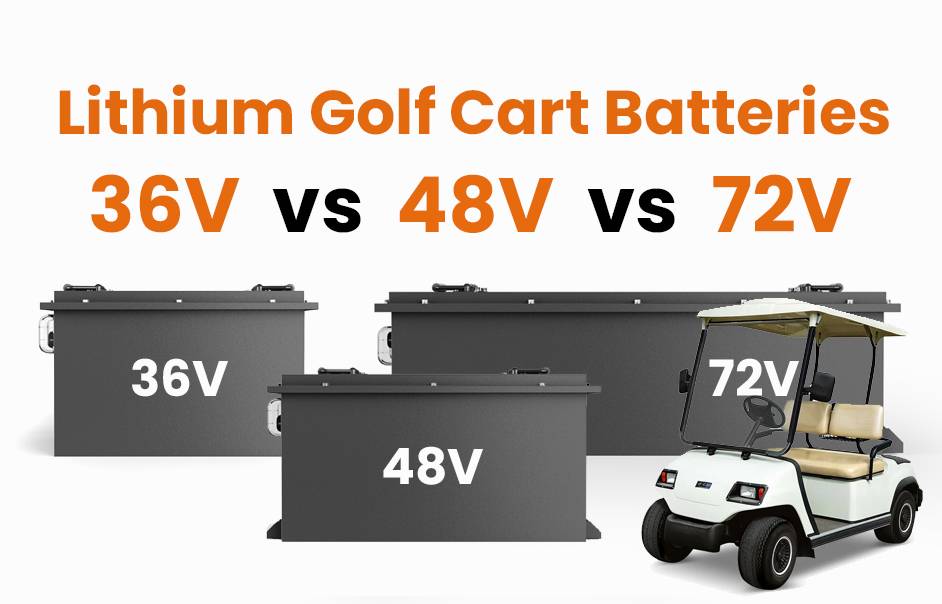
To boost speed and performance, consider upgrading the battery from a standard 36 volts to a 48 volts system. This change often requires a compatible speed controller to handle the increased voltage. Additionally, installing a high-performance motor can provide more torque and speed. Upgrading cables and connectors is also essential to handle the higher amperage without overheating.Chart Title: Speed Enhancement Options
| Upgrade |
Effect on Speed |
| Battery Voltage Increase |
Up to 33% increase in RPM |
| High-Performance Motor |
Greater torque and acceleration |
| Speed Controller Upgrade |
Better control over acceleration |
How do tire upgrades improve your golf cart’s functionality?
Upgrading tires is crucial for improving traction and stability, especially if you plan to drive on rough terrain. Larger tires provide better ground clearance and grip, making it easier to navigate uneven surfaces. When selecting tires, consider their tread pattern; aggressive tread designs are ideal for off-road use while smoother patterns work better on paved surfaces.
What customization options are available for comfort and aesthetics?
Customization options for comfort include reupholstering seats with high-quality materials or adding seat covers that reflect your personal style. You can also install additional seating or rear seat kits to accommodate more passengers. Aesthetic upgrades like custom paint jobs or decals can personalize your golf cart further, making it stand out on the course or in your neighborhood.Chart Title: Comfort and Aesthetic Customizations
| Customization Type |
Description |
| Seat Upholstery |
Enhanced comfort with stylish designs |
| Rear Seat Kits |
Increases passenger capacity |
| Custom Paint/Decals |
Personalizes appearance |
How can you enhance safety features on your golf cart?
Safety enhancements are vital for ensuring a secure driving experience. Installing LED lights improves visibility during night rides, while turn signals and brake lights increase awareness among other drivers. Additionally, consider adding rearview mirrors for better visibility of surroundings and installing seat belts if they are not already present.
What practical accessories can make your golf cart more versatile?
Practical accessories can significantly increase the utility of your golf cart. Consider adding:
- Coolers: Perfect for keeping drinks cold during outings.
- Storage Racks: Useful for carrying equipment or groceries.
- Trailer Hitches: Allowing you to tow small trailers for additional cargo.
Chart Title: Practical Accessories for Golf Carts
| Accessory |
Functionality |
| Coolers |
Keeps beverages cold |
| Storage Racks |
Provides additional carrying capacity |
| Trailer Hitches |
Enables towing capabilities |
Why is regular maintenance important after upgrading your golf cart?
After upgrading your golf cart, regular maintenance becomes crucial to ensure that all components function optimally together. This includes checking battery health, inspecting tire pressure, and ensuring that all electrical connections are secure. Regular tune-ups help prevent premature wear on upgraded parts and maintain overall performance.
FAQ Section
What are some common upgrades for golf carts?
Common upgrades include battery voltage increases, larger tires, lift kits, enhanced seating, and lighting improvements.How do I increase the speed of my golf cart?
You can increase speed by upgrading the battery voltage and installing a compatible speed controller along with a high-performance motor.Are tire upgrades necessary?
Yes, tire upgrades improve traction and stability, especially when driving on rough terrains.What safety features should I consider?
Consider adding LED lights, turn signals, rearview mirrors, and seat belts to enhance safety while driving.
Industrial News
Recent trends in the golf cart industry show an increasing demand for customization options that enhance both performance and aesthetics. Manufacturers are responding by offering more diverse upgrade kits that cater to various needs—from off-road capabilities to luxury features like custom seating and advanced lighting systems. This shift reflects a growing interest in using golf carts beyond traditional golfing environments into recreational vehicles suitable for various outdoor activities.
Redway Power Insights
“Customizing your golf cart is not just about aesthetics; it’s about enhancing functionality and safety,” states an expert at Redway Power. “Investing in quality upgrades ensures that you enjoy every ride while maximizing the lifespan of your vehicle.”
FAQs
How to install a sound system on a golf cart?
To install a sound system on a golf cart, follow these general steps: select a suitable sound system, mount the speakers in desired locations, connect the head unit, wire the system to the battery, and ensure proper grounding. Adding a sound system enhances the audio experience while driving the golf cart.
- Select a Suitable Sound System: Choose a sound system that fits your budget and audio preferences, considering factors such as speakers, head units, and amplifiers.
- Mount the Speakers: Install the speakers in desired locations on the golf cart, ensuring secure and proper positioning for optimal sound quality.
- Connect the Head Unit: Connect the head unit, such as a radio or Bluetooth receiver, to the power source and speakers according to the manufacturer’s instructions.
- Wire the System to the Battery: Wire the sound system to the golf cart’s battery, ensuring proper connections and protecting the wiring from damage.
- Ensure Proper Grounding: Establish proper grounding for the sound system to minimize interference and ensure clear audio playback.
By following the steps of selecting a suitable sound system, mounting speakers, connecting the head unit, wiring the system to the battery, and ensuring proper grounding, golf cart owners can enjoy an enhanced audio experience while driving. Adding a sound system to the golf cart allows for personalized entertainment and enjoyment during rides on the course or any other terrain.
How to extend the lifespan of a golf cart battery?
To extend the lifespan of a golf cart battery, follow these tips: regularly charge the battery, use proper charging techniques, monitor water levels, keep the batteries clean, completely charge the battery before storage, and store it in a cool, dry location. These practices can help maximize the lifespan of golf cart batteries.
- Regular Charging: Regularly charge the battery to maintain its optimal condition and prevent deep discharges.
- Proper Charging Techniques: Use proper charging techniques, avoiding overcharging or undercharging the battery.
- Monitor Water Levels: Regularly check and maintain the water levels in the battery, ensuring they are within the recommended range.
- Keep Batteries Clean: Clean the battery terminals and keep them free from corrosion to maintain good electrical connections.
- Completely Charge Before Storage: Before storing the golf cart, fully charge the battery to prevent sulfation and maintain its capacity.
- Store in a Cool, Dry Location: Store the battery in a cool, dry location away from extreme temperatures and moisture.
By following the tips of regular charging, proper charging techniques, monitoring water levels, keeping batteries clean, completely charging before storage, and storing in a cool, dry location, golf cart owners can extend the lifespan of their batteries. These practices help maintain optimal battery performance and ensure long-lasting power for a reliable golf cart experience.
How to winterize a golf cart for storage?
To winterize a golf cart for storage, follow these steps: clean the golf cart, inspect it for any issues, fully charge the battery, store it indoors, disconnect the battery, cover the cart, and store the tires properly. Winterizing ensures the golf cart remains protected and in good condition during the colder months.
- Clean the Golf Cart: Thoroughly clean the golf cart with soap and water, removing any dirt and grime accumulated during use.
- Inspect for Issues: Inspect the golf cart for any mechanical or cosmetic issues that need attention before storage.
- Fully Charge the Battery: Ensure the golf cart’s battery is fully charged to prevent damage and maintain its longevity.
- Store Indoors: Ideally, store the golf cart indoors in a dry and protected area such as a garage or shed.
- Disconnect the Battery: Disconnect the battery to prevent any power drain during storage.
- Cover the Cart: Use a cover or tarp to protect the golf cart from dust, debris, and potential moisture.
- Store the Tires Properly: Store the golf cart with tires properly inflated and consider using tire covers to protect them from sunlight and damage.
By following the steps of cleaning, inspecting, charging the battery, storing indoors, disconnecting the battery, covering, and properly storing the tires, golf cart owners can effectively winterize their carts for storage. These measures ensure the golf cart remains in good condition and ready for use when the winter season ends.
How to add seating options to a golf cart?
To add seating options to a golf cart, consider these methods: install a rear seat kit, which provides additional seating space at the back of the cart, or explore custom seating options for personalized designs and configurations. These options allow for accommodating more passengers and enhancing the versatility of the golf cart.
- Rear Seat Kit: Install a rear seat kit, which provides additional seating space at the back of the golf cart. Rear seat kits are available for different golf cart brands and models and typically include seat backs, seat cushions, and support frames.
- Custom Seating Options: Explore custom seating options, which allow for personalized designs and configurations. Custom seating options provide flexibility in terms of seating capacity and layout, catering to individual preferences and needs.
By adding seating options to a golf cart through rear seat kits or custom seating options, golf cart owners can accommodate more passengers and enhance the versatility of their carts. These options provide flexibility in terms of seating capacity and layout, allowing for a comfortable and enjoyable ride for everyone.
How to personalize a golf cart with decals and wraps?
To personalize a golf cart with decals and wraps, consider these options: apply custom paint jobs, add decals and bumper stickers, stencil names on the cart, and explore different wheel, awning, windshield, and lighting upgrades. These options allow for a unique and customized look, reflecting the individual style and personality of the golf cart owner.
- Custom Paint Jobs: Apply custom paint jobs to the golf cart, choosing colors and designs that reflect personal style and preferences.
- Decals and Bumper Stickers: Add decals and bumper stickers to the cart, showcasing personal interests and adding a touch of individuality.
- Stenciling Names: Stencil names on the cart for personalization and easy identification.
- Explore Upgrades: Explore different wheel, awning, windshield, and lighting upgrades to enhance the appearance and functionality of the golf cart.
By personalizing a golf cart with options such as custom paint jobs, decals and bumper stickers, stenciling names, and exploring different upgrades, golf cart owners can create a unique and customized look. These personalization options allow individuals to showcase their style and personality while enjoying a ride on the course or any other terrain.
How to manage heat during charging to ensure battery lifespan?
To manage heat during charging and ensure battery lifespan, install charging stations in cool, well-ventilated locations. Avoid direct sunlight and provide adequate ventilation, especially in confined spaces. These measures help prevent overheating and maintain optimal battery performance.
-
Install in Cool, Ventilated Locations: Choose charging stations that are installed in cool and well-ventilated areas. This helps maintain a suitable temperature for the batteries and prevents excessive heat buildup. Avoid placing the charging stations in direct sunlight, as it can cause uneven heating and potential damage to the batteries.
-
Avoid Direct Sunlight: Direct sunlight can significantly increase the temperature of the batteries, leading to overheating and accelerated degradation. It is important to position the charging stations in shaded areas or use covers to protect them from direct sunlight.
-
Ensure Adequate Ventilation: If the batteries are stored or charged in a confined space, it is crucial to have proper ventilation. Sufficient airflow helps dissipate heat generated during the charging process and prevents the batteries from reaching high temperatures. Check for ventilation openings or consider installing additional ventilation systems if necessary.
What are the considerations for ventilation when using batteries in a closed casing?
When using batteries in a closed casing, consider the following for ventilation: prevent the accumulation of hydrogen gas, dissipate heat generated by the batteries, and control moisture levels. Proper ventilation ensures a safe and optimal operating environment for the batteries.
-
Preventing Hydrogen Gas Accumulation: Batteries, particularly lead-acid batteries, can produce hydrogen gas during the charging and discharging process. In a closed casing, the accumulation of hydrogen gas can lead to potential safety hazards. Proper ventilation helps prevent the buildup of hydrogen gas, ensuring a safe environment for the batteries and reducing the risk of explosions or fires.
-
Dissipating Heat: Batteries generate heat during operation, and a closed casing can restrict the dissipation of heat. Adequate ventilation is essential for allowing the release of heat, preventing overheating, and maintaining optimal battery performance. Proper heat dissipation helps prolong the lifespan of the batteries and ensures their efficiency.
-
Controlling Moisture Levels: Closed casings can trap moisture, leading to condensation and potential corrosion of the batteries. Adequate ventilation helps control moisture levels within the casing, preventing the accumulation of moisture and safeguarding the batteries against potential damage. Proper moisture control contributes to the longevity and reliability of the batteries.
How to calculate the charging time of Gel, AGM, and Lithium Ion batteries?
To calculate the charging time of Gel, AGM, and Lithium Ion batteries, consider factors such as battery capacity, charging current, and efficiency. Refer to the manufacturer’s guidelines or consult a battery expert for accurate calculations tailored to the specific battery type.
-
Battery Capacity: The first consideration is the battery capacity, usually measured in Ampere-hours (Ah). The higher the capacity, the longer it takes to charge the battery fully.
-
Charging Current: The charging current is another crucial factor. Different batteries have recommended charging currents, typically expressed as a percentage of the battery capacity. It is important to follow the manufacturer’s guidelines to prevent overcharging or undercharging.
-
Efficiency: The charging efficiency of the battery and the charging system also play a role in determining the charging time. Factors such as resistance, temperature, and charging algorithm can affect the overall efficiency.
What should be done if a car battery measures below 12.6 volts?
If a car battery measures below 12.6 volts, it is advisable to charge it with a battery charger. However, it is important to note that voltage is just one measure of a battery’s health. Consider factors such as the battery’s age, condition, and overall performance. If you are unsure or experiencing persistent issues, consult a professional for proper diagnosis and assistance.
-
Charge the Battery: Charging the battery with a battery charger is the first course of action. This helps replenish the battery’s charge and brings it back to an optimal voltage level. However, it is important to remember that voltage alone does not provide a complete picture of the battery’s health.
-
Consider Other Factors: While voltage is an important indicator, it is essential to consider other factors that contribute to a battery’s overall performance. Factors such as the battery’s age, condition, and past performance should be taken into account. If the battery continues to exhibit issues or fails to hold a charge, it may require further inspection or replacement.
-
Consult a Professional: If you are unsure about the battery’s condition or experiencing persistent issues, it is recommended to consult a professional. A qualified technician can provide a proper diagnosis, assess the battery’s health, and offer appropriate solutions.